
Composting Toilets - Maintenance
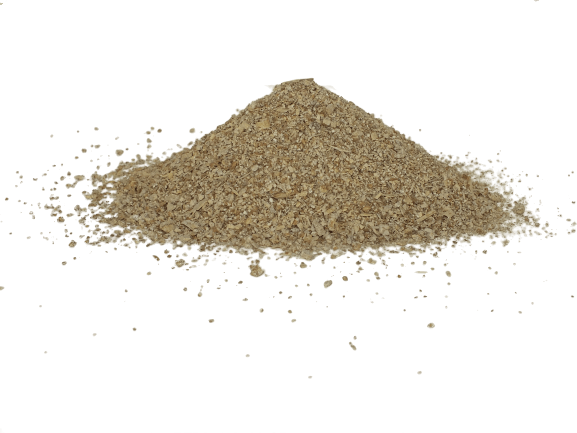
Waterless composting toilets require attention when the compost chamber reaches full capacity. You will need space to safely dispose of the compost. A bulking agent such as untreated wood shavings needs to be added to the chamber. This extra carbon balances the carbon to nitrogen ratio and increases air passage through the waste.
Starting your composting toilet
- Add 10-15cm of bulking agent to your chamber, evenly layered, and start using your toilet.
- After 2-4 days later add ¼ packet of Nature Quick Microbes mixed with warm water to the chamber via the pedestal.
- 7-10 days later add another 1/4 packet of Nature Quick Microbes mixed with warm water to the chamber via the pedestal - your system is now fully activated with live bacteria.
- Repeat these steps each time you start a chamber.
After using your composting toilet
- After urinating, just close the lid
- After every solid, add a handful of bulking agent to the system via the pedestal and add 10-12 squirts of the diluted Nature Flush Enzymes via the pedestal
- Close the lid
Cleaning and maintaining your system
- The toilet pedestals are designed to be mess free but if there is an accident, they can be cleaned using any natural-base detergent.
- Do not use any products containing alcohol, chlorine, bleach, or other strong chemicals for cleaning.
- To clean the inside of your pedestal, use the diluted Nature Flush Enzymes and a toilet brush. Do not use any chemicals
- To clean the outside of your pedestal, use mild detergent or diluted white vinegar
- For CM LP and CM HP units rotate the mixer arm each week to help lengthen the time a chamber can used; for other systems please consult your manual.
- Every 6 months spray your fan with WD 40 to length the lifespan of your fan (this helps loosen any dirt etc).
- Only use the toilet for depositing human waste, toilet paper and bulking agent.
- If a urine diverting pedestal is installed, spray some Nature Flush Enzymes down the urine outlet and flush with a small amount of water to prevent the build-up of uric acid crystals.
Rotating the chambers
Your first rotation of the chambers
You must observe safety procedures when dealing with fresh human waste. Wear protective clothing (gloves and old clothes). Do not attempt to move the chambers by yourself.
The Clivus Multrum composting toilet chambers need to be changed on a regular basis. Enough chambers must be purchased to allow the ‘out-of-service’ chamber to be out of action for a minimum of 5 months; depending on climate, from the time they are disconnected from the waste chute.
- Prepare a new ‘in-service’ chamber for use.
- Pour a small bucket of bulking agent (clean mulch) down the pedestal to cover up the waste pile.
Extra chambers
An ‘out of service’ chamber should be put in a warm sheltered position with the air intake cap attached to the lid and one to the base.
Returning a chamber to service
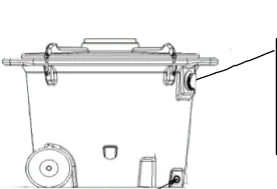
- Ensure all hose and vent connections are clear.
- Prepare the ‘in-service’ chamber for use.
If the ‘out-of-service’ chamber is to be placed away from the main vent assembly, you will need to dig a small second trench (20 x 20 x 20cms) to allow residual liquid to exit the chamber.
Connect the second liquid drain hose from the chamber to the trench and turn the valve to the open position
Removing the compost
The compost must be disposed of according to local council requirements and you are legally responsible for the safe disposal of effluent on your property.
The pile should have reduced to about 20% of its original size and contain a maximum of 75% moisture.
The compost should not be buried in areas of the garden that are in general use or where food plants are grown, nor should it be buried near streams or other bodies of water.
The size of the chamber determines how often you will need to remove the compost, along with how often the system is used, and local climatic conditions. Depending on the model of composting toilet you choose it could take 3 weeks to 6 months before the chamber requires attention.
The composting process may take up to a year. Heat can be used to speed up the process. Mixing also helps with composting. It’s important to check the quality of the compost: it must be dry and crumbly, with no offensive odour. Using worms can help this process.
Tips for disposal
- Wear protective clothing including gloves, face mask and appropriate footwear and do not allow children to access the area. Always wash your hands thoroughly after handling waste.
- Bury material at a minimum depth of 100mm for 6-12 months in an area where it will not be in contact with vegetables or surface water.
- Bury it and plant a tree over it. Be careful with native species as some are highly susceptible to phosphorus.
Odour
- We guarantee our composting toilets will not smell if installed and maintained according to the instructions.
- An odour indicates that something is wrong, and you should follow the trouble-shooting instructions supplied by your installer or supplier.
The installation of a compost toilet may require a building consent and it is best to contact your local council to discuss this as there can be site specific conditions involved. Consents also require a plan for discharging greywater. It is useful to discuss this with a geo-technical engineer.